Skip to content Skip to main navigation Skip to footer

Beginners Guide

Weebly image Quality guide

Weebly Images Quality – Complete Guide

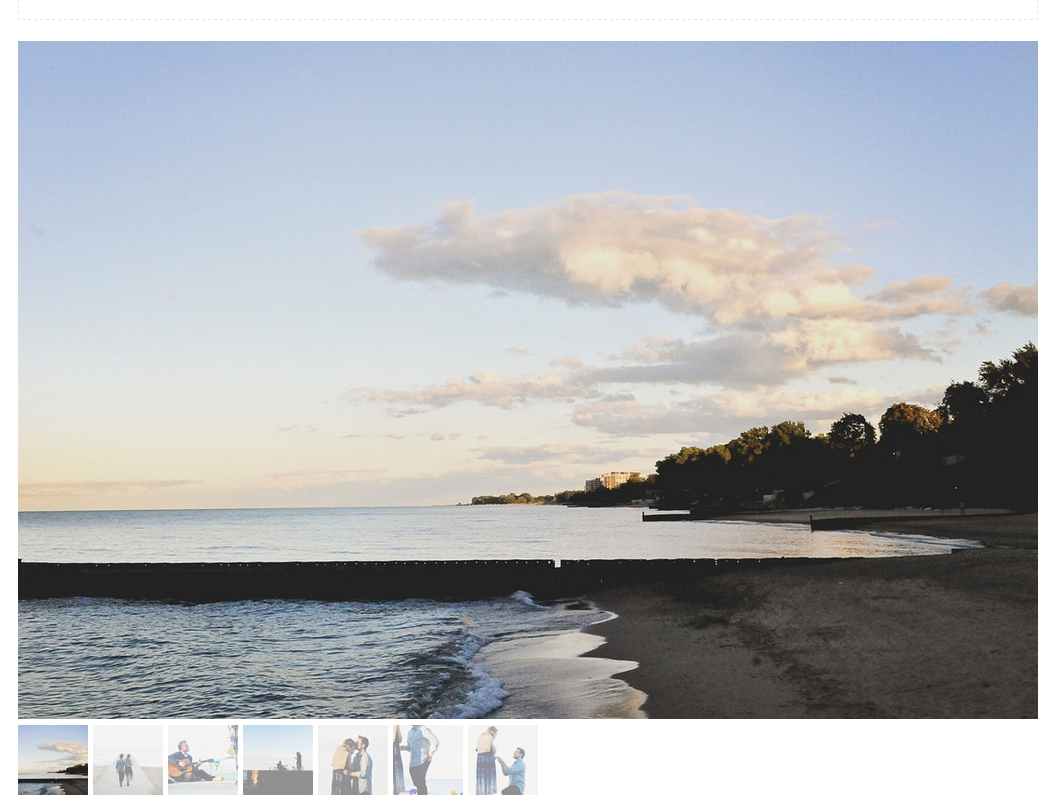
When you upload images that are already low quality or really big (dimensions or file size). The end result will not be that pleasant. In this tutorial, we will go get things explained in regard to Weebly images quality. A lot of webmasters have complained and weren’t that satisfied with the way their uploaded images look like, live in their Weebly websites. Reading this article will explain how Weebly images quality works and how you can avoid low quality images without any reduce of their resolutions.


Weebly Images Quality

For websites, Weebly always recommends images that are 72 dpi and are no larger than 1000 pixels on the longest side. Weebly akso advises that the actual images should be saved using sRGB and an extra step is to add an embedded color profile to the image.

When you upload any image to Weebly, the system will automatically optimize it for web use. Including a color profile will ensure the image retains its color exactly the way you intended.

Edit Photographs for a Better Images Quality in Weebly

There are a number of photo editing programs available. Photoshop still remains one of the top programs for editing images for web and print, by both professional, amateur photographers and web designers. They do offer a free trial if you don’t have Photoshop and would like to try it out. Just go here Photoshop Free Trial https://creative.adobe.com/products/download/photoshop

The following steps will guide you on how to setup Photoshop with the proper color profile for web images.

  1. Open Photoshop.
  2. Click the ‘edit’ tab at the top.
  3. Choose ‘color settings’ near the bottom.
  4. In the new window click the drop-down menu and choose.
    North America/Web Internet and save the changes.

Weebly image quality

Once your color profile is completed. To save your images going forward, using the new settings, click ‘Save As’ under the ‘File’ tab. Choose jpeg in the image format drop-down menu. Then be sure the ICC color profile box is checked. Click save and an image quality window will appear. Choose the quality you desire. Remember the higher the quality the larger the file size. If you slide the bar from large to small file size. You will see the actual file size in kb on the side. So long as you stay below 100kb in size. It will make it easy for just about anyone especially those on a slower connection to view your images. There will also be three options called ‘Format Options’.

Weebly image quality 2

1) Baseline Standard – This format will only display the image on the website after it is completely finished downloading.
2) Baseline Optimized – This format simply optimizes the color of the image but, is not widely supported by all web browsers.
3) Progressive – This option partially displays the image on the screen as it is downloading. Depending on the number of scans chosen, it can take 3-5 scans to display the entire image.

If you are using a different photo editing software, please refer to the user guide or color profile tutorials for your program online by doing a quick Google search.

We hope this article helped you have an idea in regard to images quality & resolution on Weebly. You may also want to see our guide on how to add image gallery into Weebly.

If you liked this tutorial, then you may consider subscribing to our WeeblyTutorials YouTube Channel for Weebly video tutorials. You can also find us on Twitter and Facebook.

Weebly slideshow of images

How to Add a Slideshow of Images in Weebly Website

This article explains how to add a slideshow of images to a Weebly website. This will allow you to display one large photo at a time within the page, with sequential thumbnails. Autoplay or manual control for scrolling through photos.


Add a Slideshow of Images to a Weebly Website

The “Slideshow” is a Weebly element used to add a slideshow on a page and grouped under “Basic” category in site editor. It allows adding six different styles of slideshow with additional customizing options.

To add a slideshow of images, drag the element to a page on your site.

Weebly slideshow

This will open the “Choose a Slideshow Style” dialog box where you can select which style of slideshow you want. This can always be changed later, so don’t spend too much time worrying about which one you want.

Below are the available styles for your slideshow:

  1. Simple slideshow
  2. Thumbnails on bottom
  3. Numbers on bottom
  4. Thumbnails on top
  5. Thumbnails on right
  6. Double thumbnails

choose Weebly slideshow

You’ll now be prompted to upload photos. Hit the big Upload Photos button or just drag some photos into the box to get started.

Then select the photos you want to upload. You’re to both delete unwanted photos and add more photos to the slideshow at any time, so you don’t have to be too selective at this point.

Depending on how many photos you’ve chosen, it may take them a few minutes to upload. Once they’re done uploading you’ll see them all on the photo management screen.

Manage Weebly slideshow

You can drag photos to re-order them, click the “x” next to each to delete them and click the “bubble” icon to add a caption that’ll appear along with the photo in the slideshow.

When you’re ready to move on, click Save and you’ll see the slideshow as part of the page.

slideshow saved

Click on the slideshow to open its toolbox and make changes.

Note that the slideshow will automatically expand to the width of the page or column in which you’ve placed it. So if you want to shrink a slideshow, you simply need to place it in a column by dragging a Spacer element too either side of it.

We hope this article helped you learn how to add a slideshow of images in Weebly. You may also want to see our guide on how to add image gallery into Weebly.

If you liked this tutorial, then you may consider subscribing to our WeeblyTutorials YouTube Channel for Weebly video tutorials. You can also find us on Twitter and Facebook.

Weebly image gallery

How to Add an Image Gallery in Weebly website

This article explains how to add an image gallery to a Weebly website. This will allow you to insert multiple images into your Weebly site. Weebly gallery displays photos in a grid, clicking on an image opens it in a large “lightbox” display. Manual control for scrolling through photos.


Add an Image Gallery in Weebly website

Weebly gallery element lets you display as many images as you’d like, in a click-to-see-a-larger-version (lightbox) grid format that you control.

In order to add a gallery, drag the Gallery element to a page to get started.

Weebly gallery

Then click the Upload Images button that appears in the element. After that, either drag images into the box or click the big green Upload Photos button.

This will let you select images from your computer to upload. You can select multiple images by holding the CTRL key on a PC or the Command key on a Mac. If you have trouble uploading images, we’d recommend limiting the number you upload to no more than 50 or so at a time. You can always add more images later.

Give the photos a few moments to upload and then you’ll see your Weebly gallery on the page.

Weebly gallery tools

Each image in the gallery automatically links to a larger version of the image. You can also link an image elsewhere, let’s say another external website or page if you like or add a caption that will appear on the enlarged version of an image. Click on the gallery to see these options.

Weebly gallery image

You may click on thumbnails and drag them around to rearrange images within the gallery. Here, the gallery’s toolbox enables you to make additional changes.

Weebly gallery box

  • Add Images: There’s no limit, but we recommend uploading no more than 100 images to any gallery so as to not overwhelm your visitors or slow down your website.
  • Determine the number of Columns you want. The default is 3, but you can use from 2 to 6.
  • Select the amount of Spacing to place between each image.
  • Adjust Caption settings and placement.
  • And with Advanced, choose if you want a border around each thumbnail or not. And select if you want to crop the thumbnails to either squares or rectangles. This cropping has no impact on the enlarged images, it only changes the look of the thumbnails to make the gallery look more uniform.

We hope this article helped you learn how to add image gallery in Weebly. You may also want to see our guide on how to insert images into Weebly.

If you liked this tutorial, then you may consider subscribing to our WeeblyTutorials YouTube Channel for Weebly video tutorials. You can also find us on Twitter and Facebook.

Weebly Facebook Image

How to set Weebly Website Thumbnails on Facebook Sharing

This article explains how to set a Weebly website thumbnails/image on Facebook sharing. Means to help you change the picture that displays when sharing Weebly website link. The trick applies as well to most of the other social media platforms such as Twitter. Well, in theory, Facebook is supposed to display images from your site from which you can choose the the one you wish to include on your post, though we rarely actually see that happen. Unfortunately there’s not a direct way within Weebly to indicate to Facebook which image to use but we’ve found a quick workaround that worked for many users.

How to Choose What Image to Display on Facebook Sharing

In order to set a Weebly website thumbnail on Facebook sharing, start by viewing the published site and right-clicking the image to copy image address. Then in Weebly, go to Edit Site > Pages, click the page you wish to use, SEO Settings, under Header Code enter this code:

<meta property=”og:image” content=”fully_qualified_image_url_here” />

Once you do this, you’ll need to go to the Facebook Debugger and re-scan your site. The debugger will then pick up the new HTML OG tags you’ve added. https://developers.facebook.com/tools/debug/


We hope this article helped you learn how to set Weebly website thumbnails on Facebook sharing. You may also want to see our guide on how to stop search engines from crawling a Weebly site.

If you liked this tutorial, then you may consider subscribing to our WeeblyTutorials YouTube Channel for Weebly video tutorials. You can also find us on Twitter and Facebook.

Upload documents to Weebly

Upload PDF, Word, PowerPoint files to Weebly

This article walks you through the process of uploading any type of documents to Weebly. Files such as PDF, Word, PowerPoint and so on can either be simply added or embedded to Weebly.


Upload and Link to a Document (or Other File)

You can link to any given file such as PDF, Word, PowerPoint or whatever by highlighting the text you want to link or clicking on an image and choosing the link option.

If you’re linking text, it will look like this:

Weebly selected text link

If you’re linking an image, it will look like this:

weebly select image link

Both image and text links will open a dialog box like the one shown below.

file-link Weebly

Click on File and select the file you want to link to. You can upload a new file or use one that you’ve uploaded in the past. If you scroll up in the dialog box you’ll see a search field you can use to locate a previously uploaded file by name.

You can choose to have your linked file open in a new window, but keep in mind that not all file types can be opened in a browser. If the visitor’s browser doesn’t have the ability to display the file, it will attempt to download the file instead.

Video: How to Upload Documents to Weebly

You have the option to upload and link to pretty much any kind of document, allowing a visitor to download it to their computer. This video explains it all.

[fusion_youtube id=”NleFM3hzHxY” width=”” height=”” autoplay=”false” api_params=”” hide_on_mobile=”small-visibility,medium-visibility,large-visibility” class=””][/fusion_youtube]

We hope this article helped you learn how to upload documents to Weebly. You may also want to see our guide on how to stop search engines from crawling a Weebly site.

If you liked this tutorial, then you may consider subscribing to our WeeblyTutorials YouTube Channel for Weebly video tutorials. You can also find us on Twitter and Facebook.

Weebly down

Error: Weebly Down for Unexpected Maintenance

Do you believe that Weebly down? Has anyone been having trouble logging into Weebly? Did not have access to the Weebly Site Editor or couldn’t simply publish the website for example? These kinds of rare errors and technical issues can happen everywhere and to any hosting provider. Weebly isn’t the exception. They are, however, doing a great job resolving these for quick.

This article is simply made available to reassure our users that these kinds of errors are absolutely temporary. And to provide you with some solutions.


Why Weebly Down?

Weebly, like any other hosting provider, hosts its data on servers which they are located in different datacenters. Those servers may face temporary issues at any given time. Being a Web Solutions Specialist for over 7 years, I can confirm that servers can go down if anything goes wrong. If your website isn’t accessible and shows a database connection related issue, then something has definitely been altered, (just maybe not by you). Files could have been moved by the database admin, someone could have updated a switch causing a brief blip in networking, or someone could have even accidentally updated software without telling everyone, etc.

First things first: A server is just software running on a computer, whether locally or remotely. The massively powerful computers that are themselves referred to as “servers” are named as such to differentiate them from the laptops and desktops we all use to get our work done and browse our social media accounts.

With that in mind, this issue usually walks the gamut from “I can’t reach a desired website” to “My remote files are missing” or “The server room has lost power” (which could cause all of the above of course!). If anything in the server that makes your files available is malfunctioning, the entire server is considered to be down (unavailable). That’s what may happen sometimes to one of the servers that host Weebly-powered websites.

What Can You Do when Weebly is Down?

If you haven’t been able to update your company website or let’s say couldn’t access your Weebly account, chances are high that there’s an issue with Weebly. Before we dig more into details, the issue could be related to your computer and/or network, so you may want to make sure that your website is down for everyone and not just from your side. If it’s confirmed that it’s really down, in this case, you want to give it few minutes as this kind of problems are temporary and usually fixed within a short period of time. If the problem persists, you may want to reach out to Weebly support, either via online Chat, phone, emails. Just rest assured that everything at the end will be resolved.

We hope this article helped you learn how to react when you believe Weebly is down and your websites aren’t reachable. You may also want to see our guide on how to stop search engines from crawling a Weebly site.

If you liked this tutorial, then you may consider subscribing to our WeeblyTutorials YouTube Channel for Weebly video tutorials. You can also find us on Twitter and Facebook.

WordPress to Weebly

How to Move from WordPress to Weebly

This article goes through the process of how we can move from WordPress to Weebly.

If you’ve already created a Weebly account, you can start building your website while keeping the previous one running as it is. You can then connect your domain to Weebly if you’ve registered it elsewhere once you’re ready for the new site at Weebly to go live and replace the WordPress site. Technically, there’s not a way to directly transfer the website itself from WordPress over to Weebly, so you would be building the site fresh here. Once you’re happy with the look of the site you’ve created with Weebly, you can connect your domain to it and then publish right away.


Step 1. Getting Started – WordPress to Weebly

To create a Weebly blog, you need two things:

– A Weebly account (this is where your website lives on the internet) – Mandatory.

– A domain name (this is the name of your blog i.e weeblytutorials.com) – Optional as Weebly already provides you with a free subdomain. But it’s always professional to have your own domain name.

Unless you’re getting a premium subscription, Weebly itself is free. Domain name though comes at a cost of around $12.99 / year.

Thankfully, Bluehost, one of the domain oldest trusted registrars has agreed to offer our users with over 60% off on domain name registration.

Step 2. Copy and Paste Content

Once you have setup your Weebly website and have already created the needed pages and posts, you can begin to manually copy the relevant text from WordPress and paste it into the equivalent page in Weebly.

Clearly, you will want to bring over your images/videos as well. However, this requires you to save the images from the WordPress site and upload them manually to the Weebly site. Bear in mind that you will need to repeat these steps for each post and page on your Weebly site.

Unfortunately, automated migration from WordPress to Weebly does not exist. Will have to manually copy/paste everything ourselves.

Step 3. Point Your Domain to the Destination Site

Once you have built your new Weebly website, tested it and made sure it’s working as it should be, you may then proceed and point the domain.

The final step, once you are happy with the migration, will be to switch over your domain. This is a two-step process:

1. Transfer Your Domain from WordPress:

  1. Go to Domains tab in your My Site menu. Select Transfer Domain, and you will see options to transfer the domain to a different registrar, user, or site.
  2. Select Transfer to a different registrar and you will see a message explaining that your domain first needs to be unlocked. Click Update Settings and Continue. The next page will confirm that you have been sent a transfer code (also known as an “auth code” or “EPP code”) via email.
  3. Within a few minutes, you will receive an email with a transfer code (listed next to Authorization Info). To complete your domain transfer, provide the code following Authorization Info to your new registrar. This unique code allows us to release your domain to your new registrar for registration.

2. Change Your Weebly Site to Use Your Domain

Once the transfer is complete, Weebly can be set to use your domain, instead of the temporary one you set-up in the beginning.

You just need to open up the Settings tab and then click the “Change” button connected to the Site Address. Continue with the listed steps.

We hope this article helped you learn how to move from WordPress to Weebly. You may also want to see our guide on how to stop search engines from crawling a Weebly site.

If you liked this tutorial, then you may consider subscribing to our WeeblyTutorials YouTube Channel for Weebly video tutorials. You can also find us on Twitter and Facebook.

Unpublish Weebly

How to Un-publish a Weebly Website

At a certain time, you may want to completely un-publish your Weebly website. This article shows how to do so.


Once logged into your Weebly Site Editor, under Settings, click General, at the bottom of the page Weebly shows you the last time you published, as well as giving you the option to Un-Publish your site. When you decide you’re ready for people to view your site again, just click Publish. It’s that simple.

Un-publish weebly

We hope this article helped you learn how to un-publish your Weebly website. You may also want to see our guide on how to stop search engines from crawling a Weebly site.

If you liked this tutorial, then you may consider subscribing to our WeeblyTutorials YouTube Channel for Weebly video tutorials. You can also find us on Twitter and Facebook.

How to Password Protect a Weebly Website

Weebly password protect feature is available for Weebly Pro and Business users. It allows owners to lock some pages or the entire website with a password. This is a very useful option especially when you run a personal or confidential website and want to provide access to only a few visitors.

Search engines though will still index your site and show it on the search result pages even though you set a password. Learn about hiding your Weebly website or page from search engines.


How to Password Protect your Entire Weebly Website

Once logged in into your Weebly Site Editor, under the Settings tab > General > Site Password, you can enter the password you’d like to use to protect your pages, then click Save.

Pssword protect weebly

How to Password Protect Certain Pages on Weebly

Entering a website password by following the steps listed above will automatically lock all the pages on your site. If you only want to password protect some specific pages, you can go to the Pages tab and selectively enable or disable the password protection using the visibility menu.

Password protect Weebly pages

Related: Ultimate Guide to Creating a Weebly Membership Website

We hope this article helped you learn how to restrict access to your Weebly website. You may also want to see our guide on how to stop search engines from crawling a Weebly site.

If you liked this tutorial, then you may consider subscribing to our WeeblyTutorials YouTube Channel for Weebly video tutorials. You can also find us on Twitter and Facebook.

Connect PayPal with Weebly

Add PayPal to your Weebly website

Weebly offers the following four checkout options:

  • Credit Cards
  • Square
  • PayPal
  • Authorize.Net

Among all PayPal is the preferred payment system for online vendors due to its popularity and the ease of use. This tutorial describes how to enable PayPal to accept payments online on your Weebly website.

Add PayPal to Weebly
  1. Login to your Weebly account and select the site you want to edit.
  2. Click on the “Store” tab in Weebly editor.
  3. Click on the “Setup” tab.
  4. Click on “Checkout” tab.

You will see the below screen offering the different checkout options Weebly has.

Add PayPal to Weebly

Click on the “Connect” button under PayPal section to see a popup screen asking you to enter your PayPal ID. Your PayPal id will be connected as a checkout option and you can disconnect it any time later.

We hope this article helped you learn how to connect PayPal to your Weebly website. You may also want to see our guide on how to stop search engines from crawling a Weebly site.

If you liked this tutorial, then you may consider subscribing to our WeeblyTutorials YouTube Channel for Weebly video tutorials. You can also find us on Twitter and Facebook.